Create your OneDrive for Business OAuth application
Filestack offers OneDrive for Business as a source in our File Pickers. You must first have a Microsoft account that is configured by the admin of Azure Active Directory and an account that has the OneDrive for Business license assigned to access this Azure account.
To utilize Custom Authentication and use of your own Key, please have an admin of the Azure Active Directory and your Filestack account follow the steps below.
Create Onedrive for Business Application
In order to create Onedrive for Business Application please log in with the admin credentials to your Microsoft Azure.
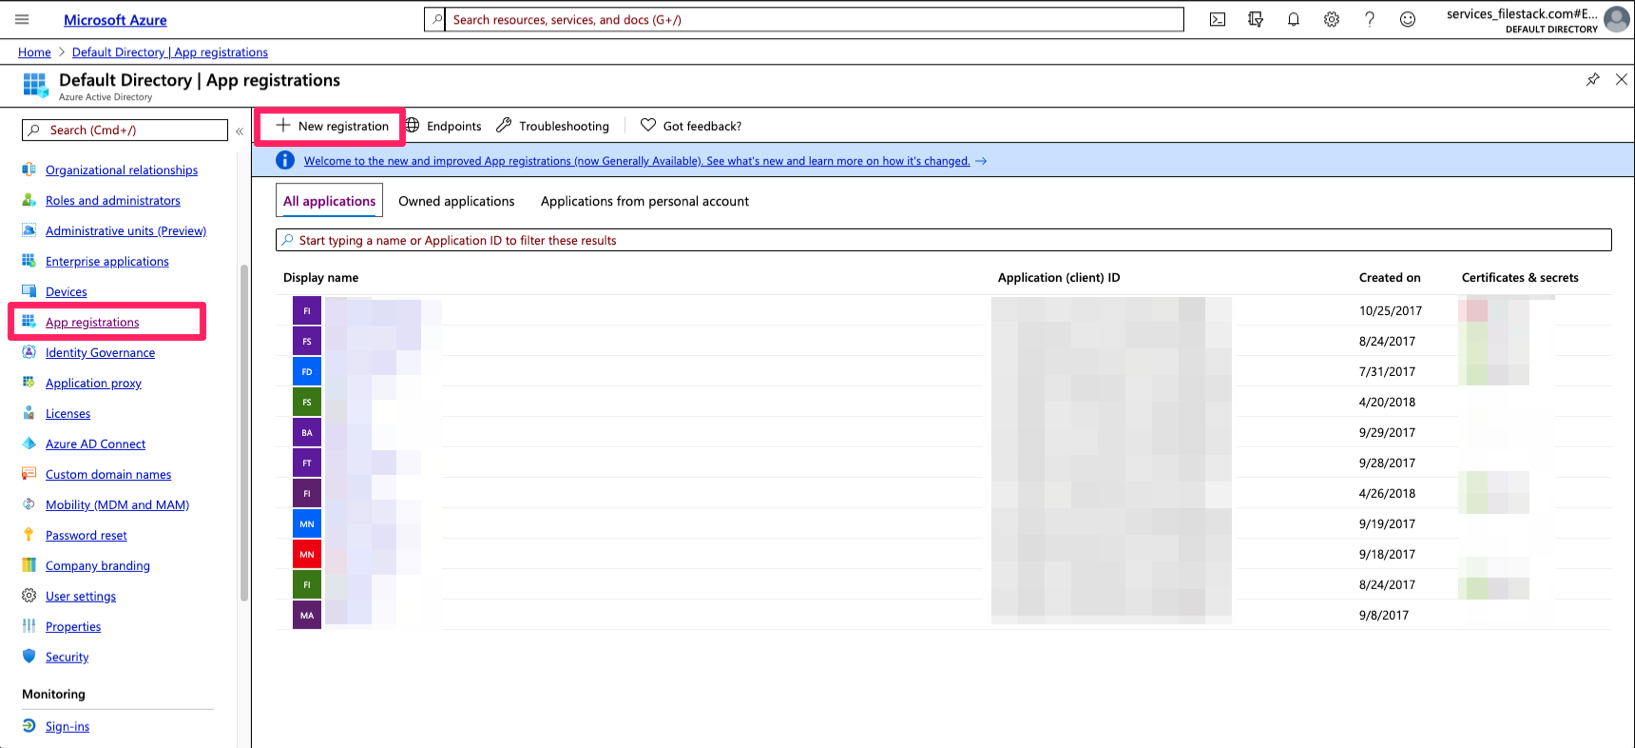
Once log in, navigate to Azure Active Directory.

Go to App registrations section and choose New registration:
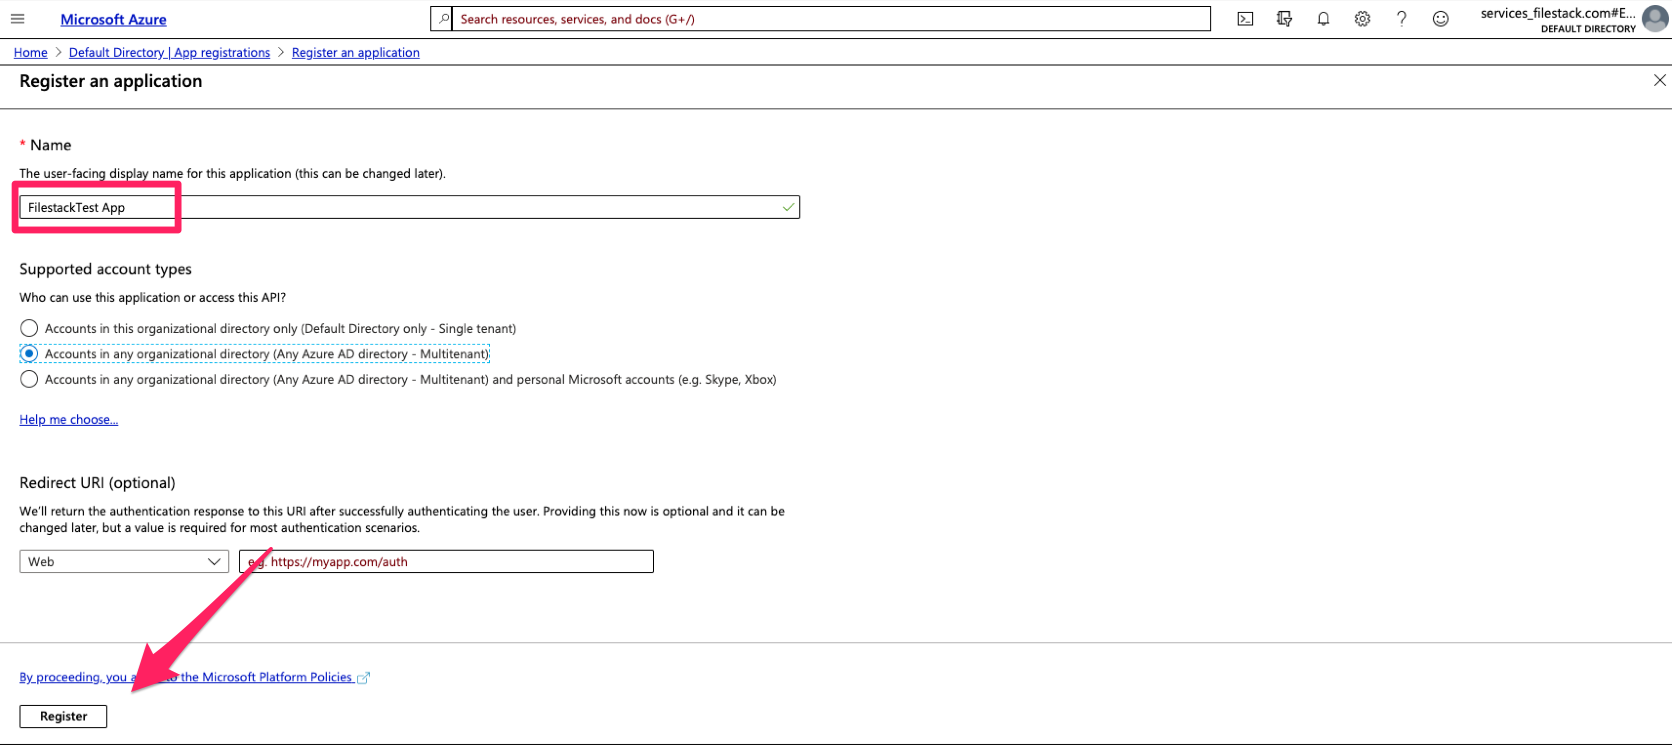
Choose the Name for your application and select:
- Accounts in any organizational directory (Any Azure AD directory - Multitenant)
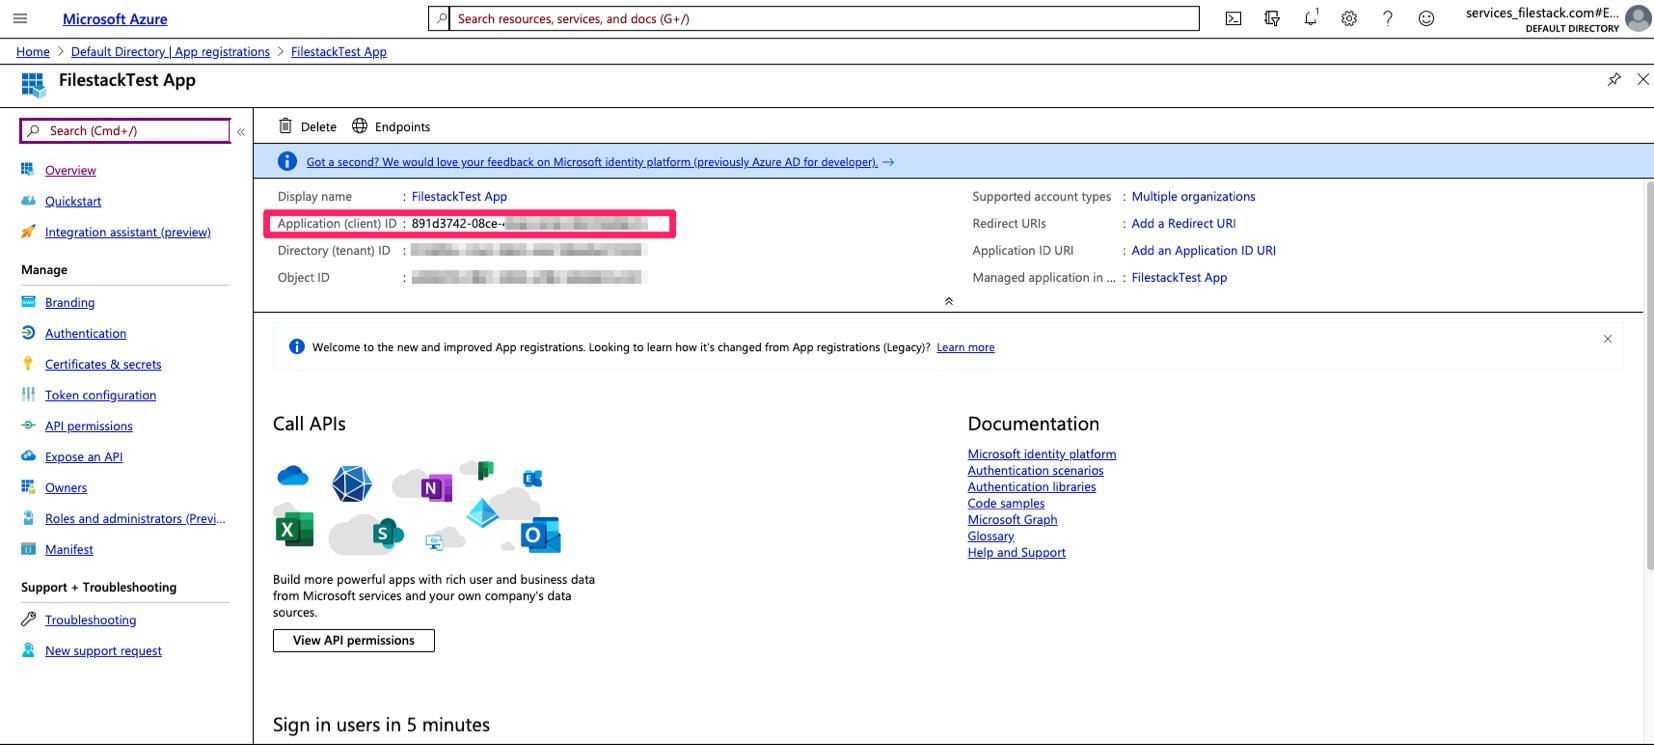
Onedrive for Business application ID
From the list of applications you have under your Azure Active Directory choose the one you have already created. The Application ID will be required to use with your Application Client Secret Key in the Developer Portal. You will be able to access this ID as long as this Azure Application exists in your account:
Add redirect URI into your Onedrive for Business application
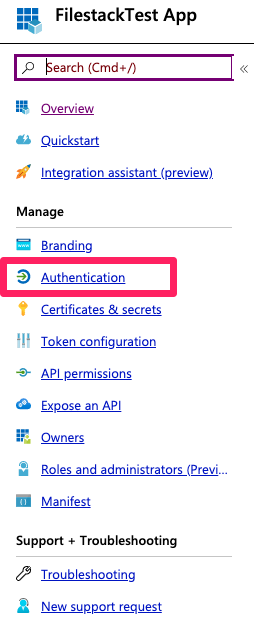
In order to integrate your Onedrive for Business application with Filestack it is required to implement redirect URI. Please navigate to Authentication section:
choose the Add a platform button:

and click Web button:
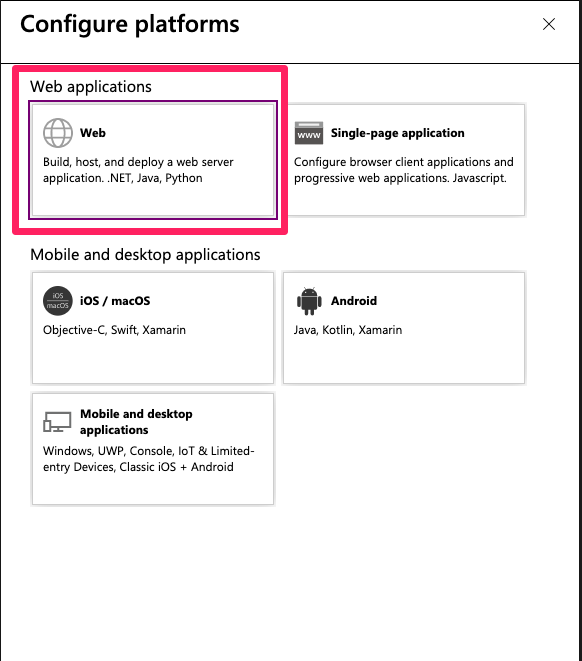
You sould be able to add the redirect URIs listed below:
https://www.filestackapi.com/api/client/onedriveforbusiness/authCallback/saveas
https://www.filestackapi.com/api/client/onedriveforbusiness/authCallback/open
Replace www.filestackapi.com with your own domain if you are using CNAME:
https://www.yourdomain.com/api/client/onedriveforbusiness/authCallback/saveas
https://www.yourdomain.com/api/client/onedriveforbusiness/authCallback/open
After including the above URIs click Save button located at the top left side of this section:
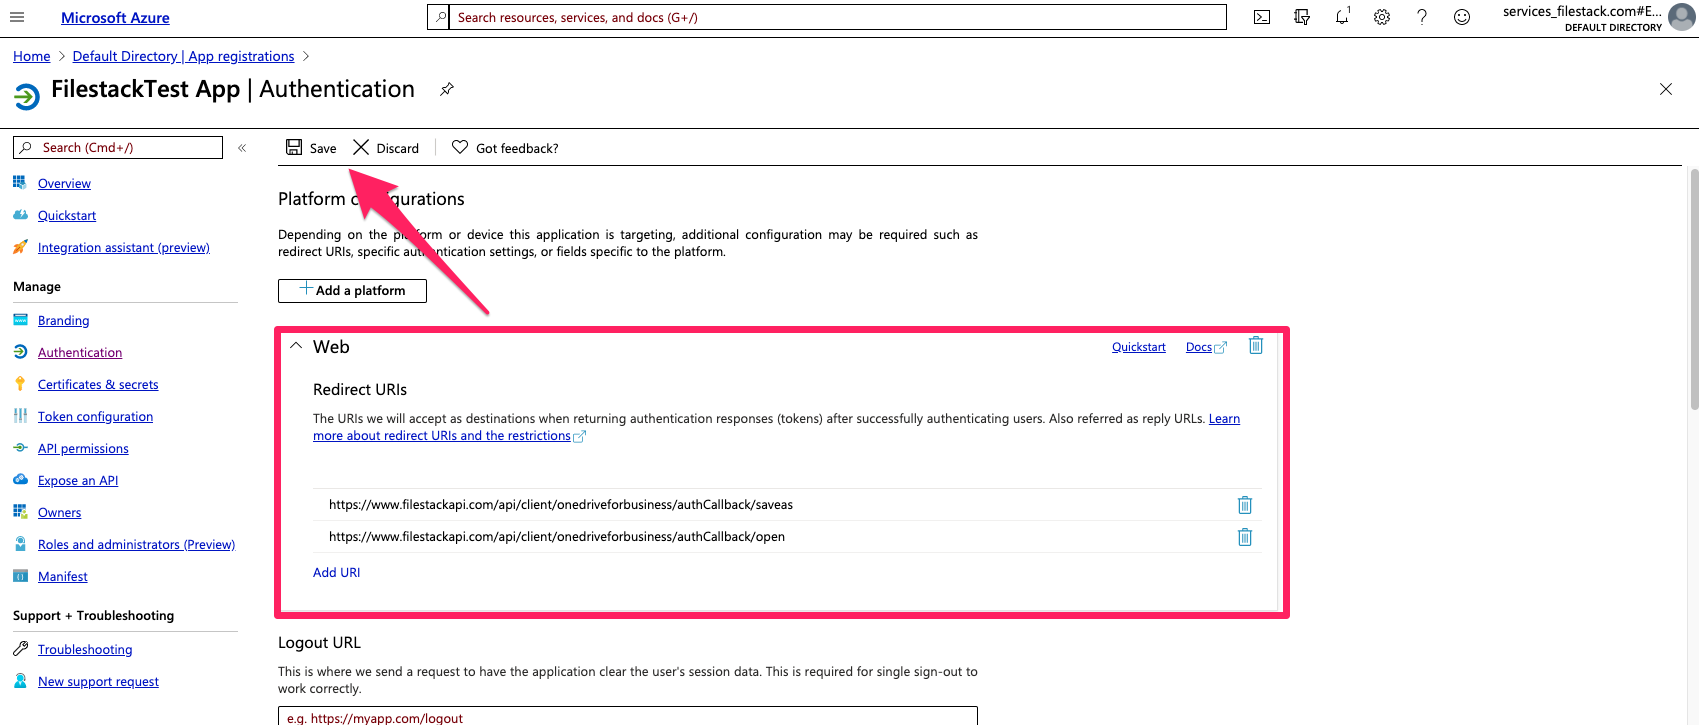
Add proper permissions to your Onedrive for Business application
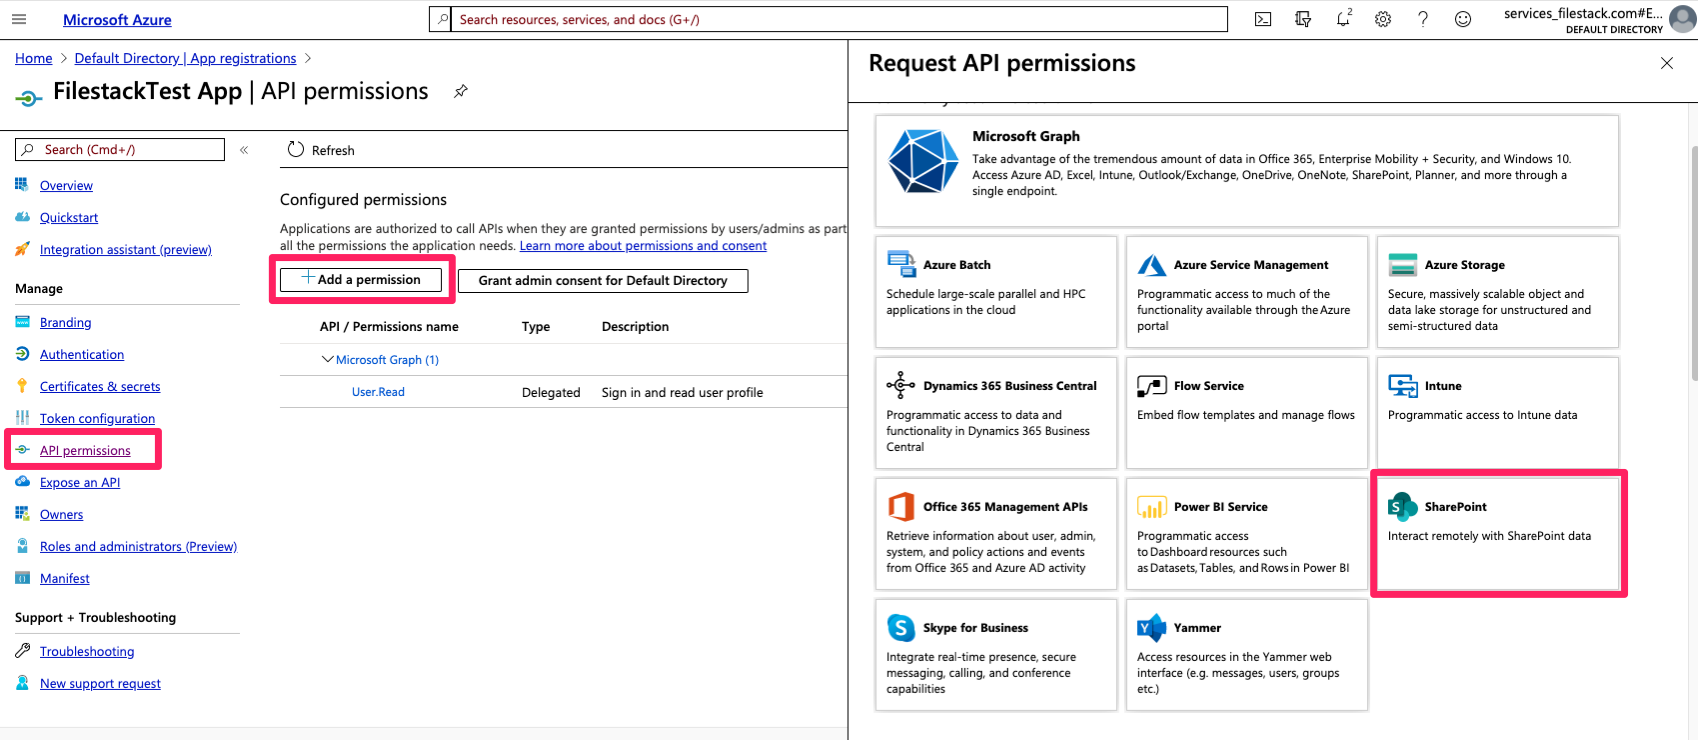
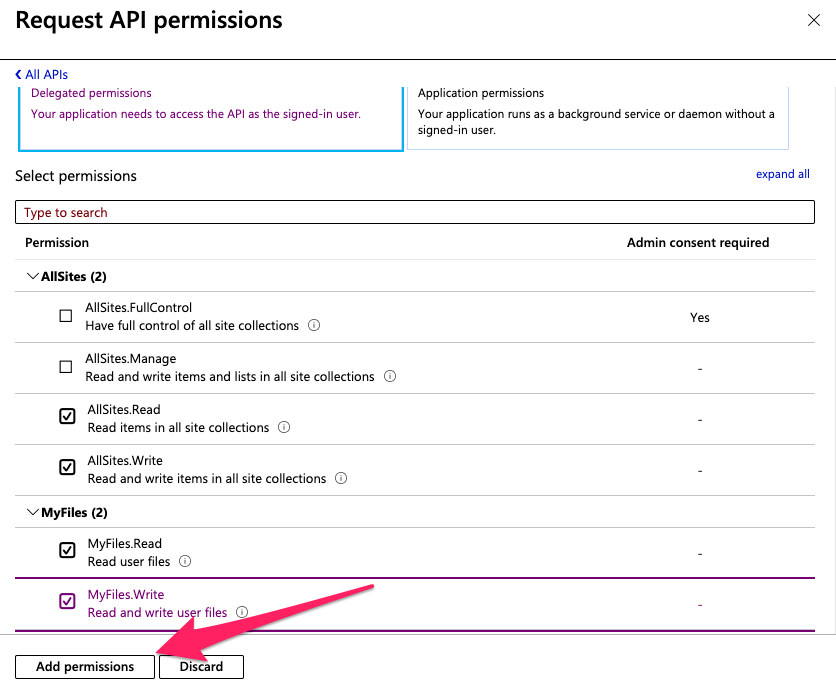
Now, you need to add proper permissions to your Onedrive for Busineess application. Please navidate to API Permissions section and then click Add a permission button. Find and click SharePoint permission:
Choose the Delegated permissions option:
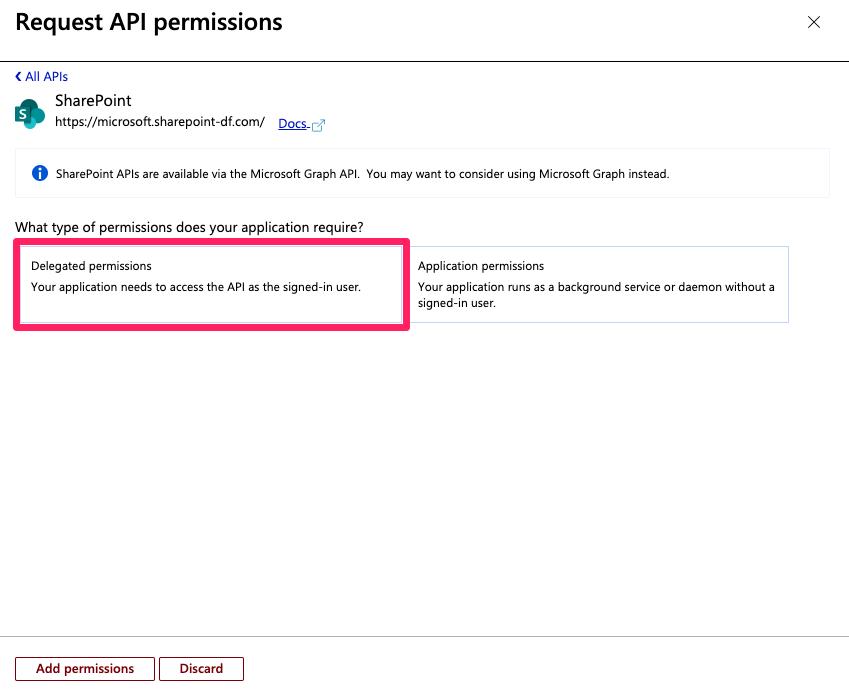
and add the permissions listed below. Then click Add permissions button.
Required permissions:
- Read items in all site collections
- Read and write items in all site collection
- Read user files
- Read and write user files
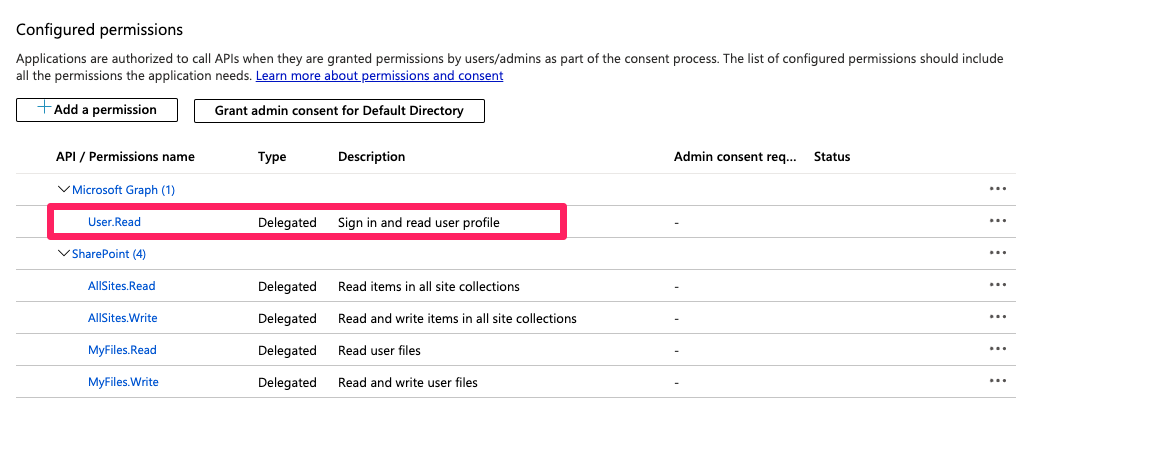
Please make sure that scope:
- Sign in and use user profile
is present on the permissions list
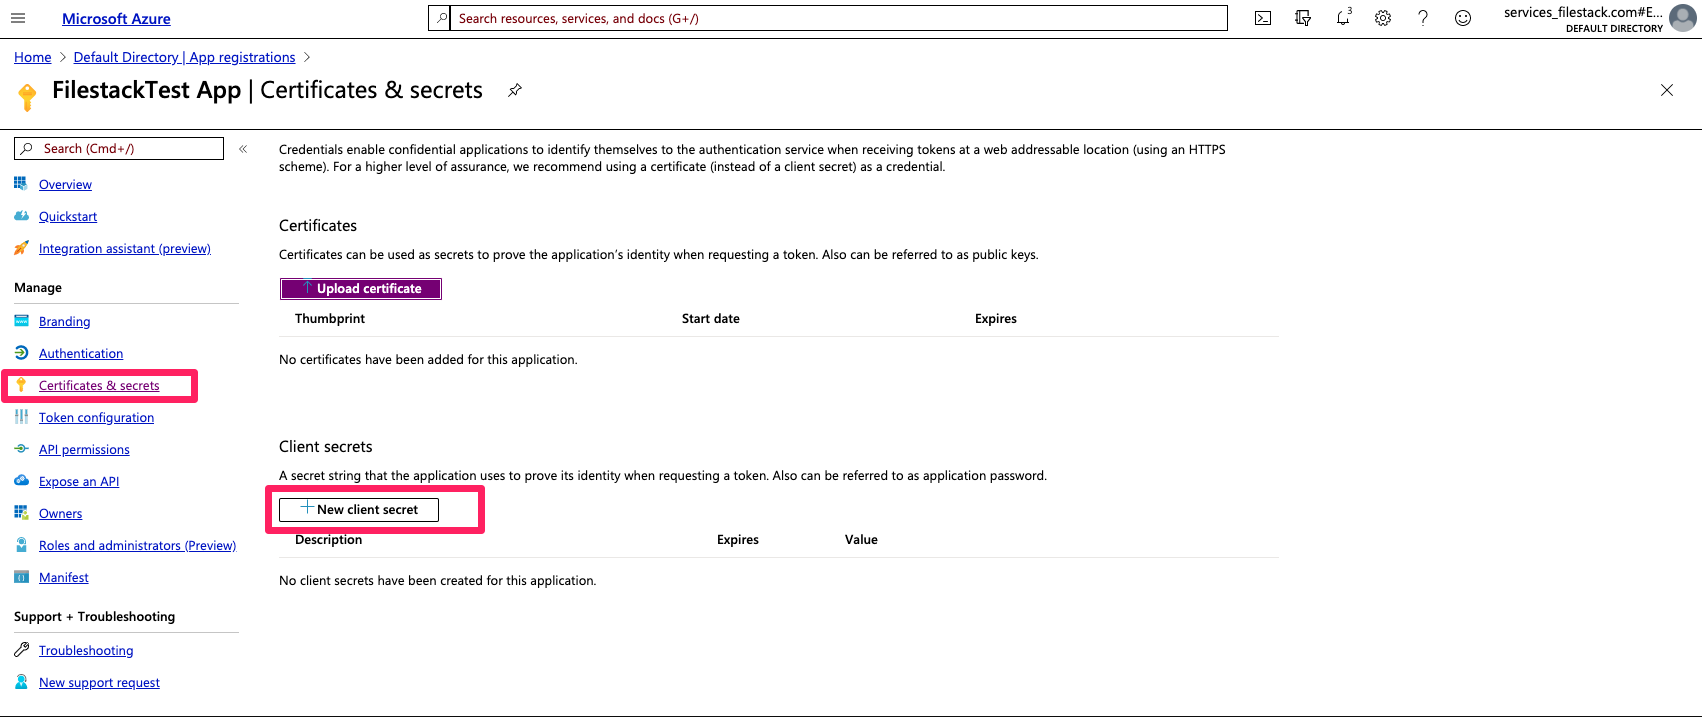
Generate Application Secrate Key
One of the last steps to integrate your application with Filestack is to generate the Secrate Key. Please navigate to the Certificates and secrets section and click New client secret button:
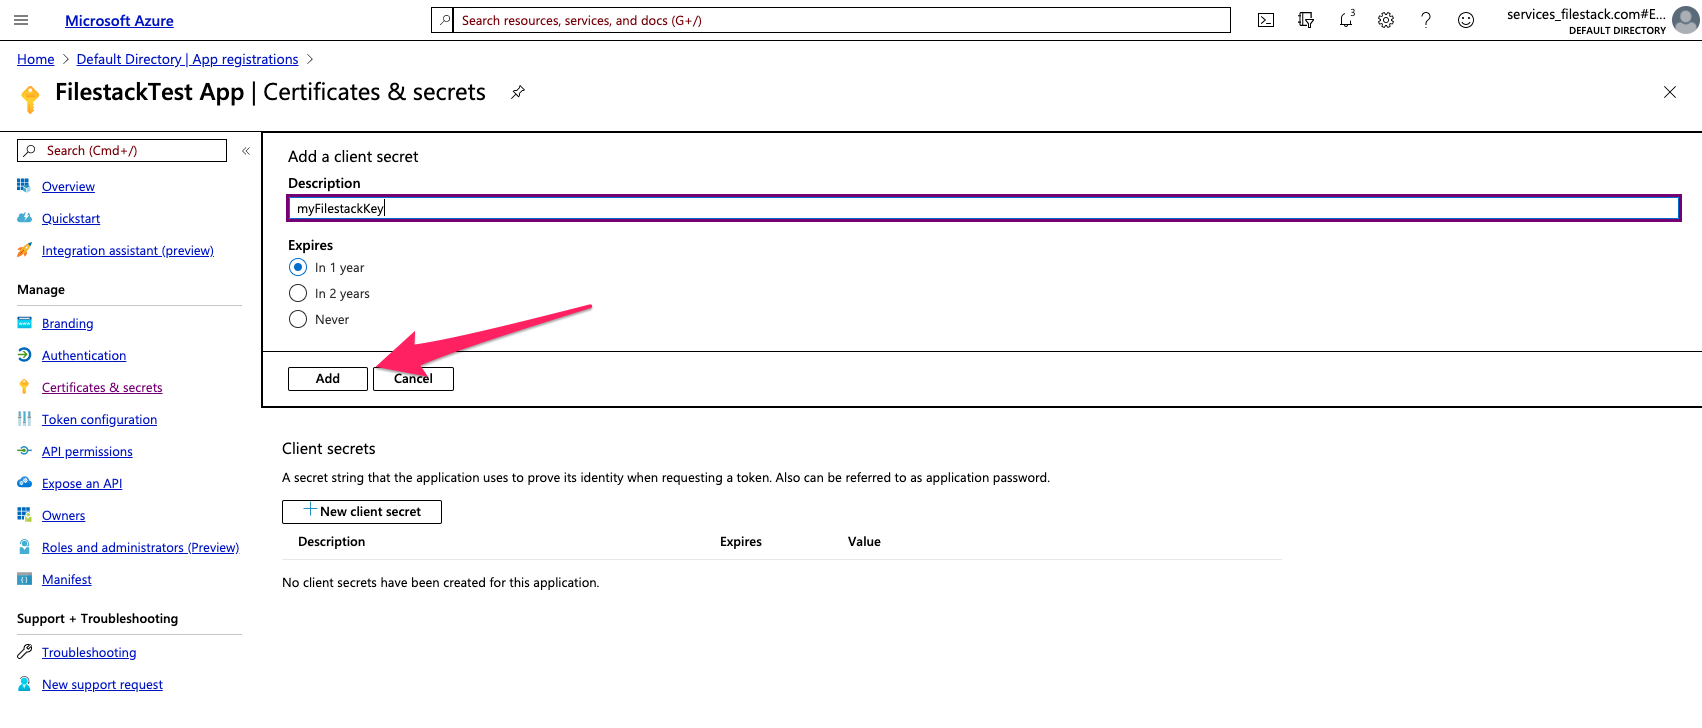
Choose the description for your key and desired expiration date. Once you click Add the key will be displayed. Be sure to copy it because it will disappear after you leave this section.
Add Onedrive for Business OAuth keys to Developer Portal
Now you can add your OAuths keys to Developer Portal. Please log in to your account, navigate to Configuration -> Auth keys section, scroll down to the bottom of the page and add your Application Client ID and your Application Client Secret Key:

Web Picker Config
The relevant source value in our web picker is onedriveforbusiness.
const options = {
  fromSources: [ 'onedriveforbusiness' ]
};

client.picker(options).open();
If you have any questions about this process please reach out to our support team.